")
")
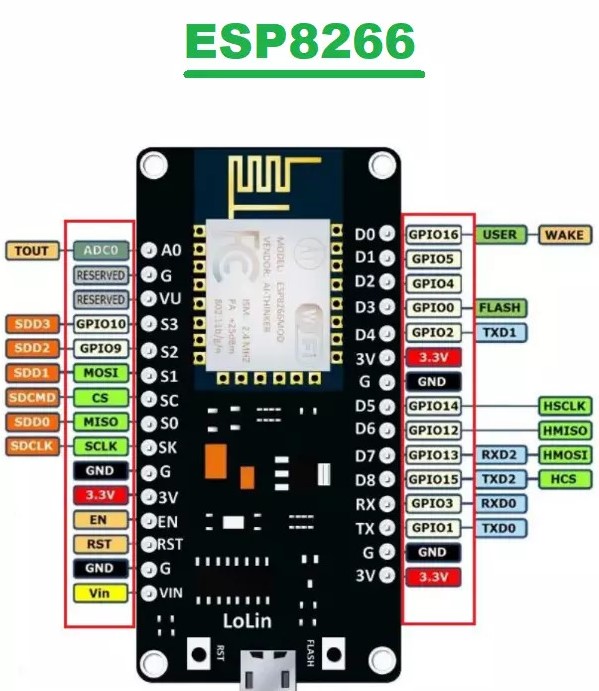
The Espressif ESP8266 is a low-cost, high-performance wireless SOC that provides endless possibilities for integrating WiFi functionality into other systems. It can control input and output like Arduino, but the special thing is that it contains a built-in WiFi adapter.
Compared to other Wi-Fi solutions on the market, ESP is the best choice for most "Internet of Things" projects! Since it is cheap and really only costs a few euros, of course it can be integrated into advanced projects as well. ESP is also compatible with Arduino IDE. If you have used Arduino before, you can quickly start using ESP8266, or the more powerful ESP32. ESP series Wi-Fi modules are popular in IoT projects. However, due to the high speed of modernization and updating, it often suffers from a lack, like most Opensource projects, so we encounter various difficulties related to the implementation of such elements. Development kits are a great help in the initial phase of creating a prototype. A big advantage of ESP modules is the possibility of programming in Python, which I also prefer. I used ESP-12E development kit with ESP8266 and WiFi NodeMcu V3 with CH340 serial chip.
For beginners in Python, in this case we are talking about MicroPython, the most suitable development environment is Thonny IDE (IDE = integrated development environment). Using the IDE Thonny, we upload microPython to the flash memory of the ESP12E. The basis of this module is the ESP8266 microprocessor supplemented with a Wifi unit.
To use micropython, it is necessary to install it in the flash memory of the microprocessor in the form of firmware. This is done easily using the ESPtool utility built into the Thonny IDE development environment. In the Tools menu, select the Options item and select the Compiller tab
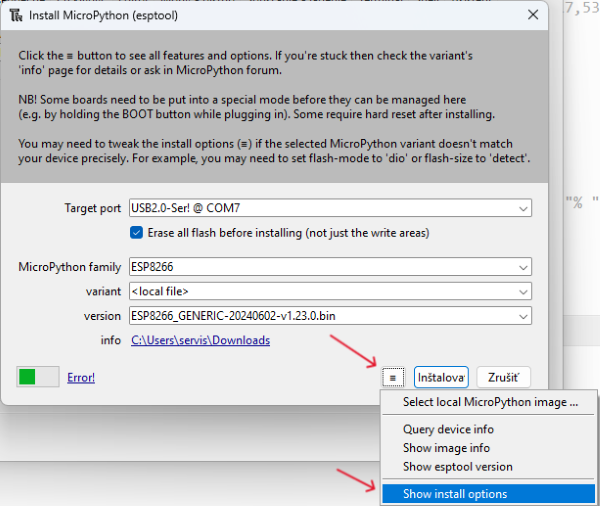
In the dialog box that opens, click on the menu symbol and select Show install options from the drop-down menu. In the following dialog, you select the necessary parameters.

Select the port through which your ESP module is connected to the PC (COM7 in my case), select the type of microcomputer (8266), use the version selector to select the downloaded firmware image (file with MicroPython interpreter) for Espressif 8266. Then click the Install button. The esptool utility will do everything necessary, erase the flash ROM and upload the firmware to a suitable place in the ESP-12E memory according to the installation data contained in the firmware image.
It is critical to choose the right flash memory size for this ESP-12E module, i.e. 4MB! Failure to comply with this condition will cause a faulty firmware upload.
The progress of the firmware upload can be monitored in the dialog of the esptool window.

Successful upload of the firmware is indicated by the message Done! The module needs to be reset, and micropython functionality is signaled by displaying the version of MicroPython and a cursor in the shell of the Tonny IDE development environment.
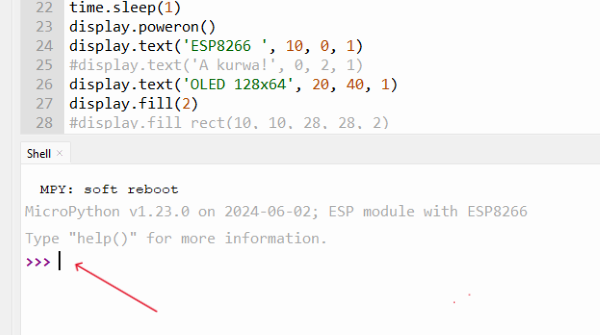 Now the ESP-12E module is ready to receive and execute your python program.
You can download all necessary files for uploading firmware to the ESP-12E module in the download section . Contains Micropython image, documentation including schematics and manuals.