")
")
Inspired by the raspberry PI project https://bigpi.vc/build-a-simple-radiation-monitor-using-a-raspberry-pi-influxdb-and-grafana/ and previously published on github.

The main motivation for the implementation of this project was the lack of chips for the production Raspberry Pi boards. last but not least, their price. Most of Raspebrry Pi boards will be available maybe by the end of the year 2023, currently are out of stock over the world.
A simple Python application to measure, record and track background radiation in your area. Radiation is detected with a low-cost Radiation board CAJOE , and connected to a Banana Pi M2 ZERO SBC (BPI-M2). The board feeds data into the InfluxDB. Grafana is used for log appealing log visualization. Measured data are stored locally on the BPI-M2.
Banana Pi SBCs are supposed to be compatible with Raspberry Pi SBC. This happened not to be the case during the project. The GPIO should be compatible with Raspberry Pi and can run Raspberry Pi images directly, but it also did not appear to be true. GPIO hardware compatibility is very close to RaspberryPI, but some important libraries only support the BCM chips used in the manufacture of RaspberryPI boards and are not part of BananaPi. Despite this, bananapis SBCs are powerful, cost effective and suitable for the use case.
Hardware requirements
- A Banana Pi M2 ZERO SBC (BPI-M2) (any model should be suitable, I have used one of simplest BPI-M2 ZERO)
- An 8GB (or larger) SD card
- A power supply (PSU)
- A radiation detector Banggood , as kit for more skils users, or on AliExpress
- Some Dupont cables/jumper jerky (you'll need 3 female-female cables

Hardware connection
There are 3 connections we need to make from the radiation detector board to the BPI-M2 ZERO. They are +5V and Ground (GND) for power, and the output pulse line to detect the pulses generated by detection board. Note that this is called `VIN` which can be a bit confusing as this usually means voltage input or something similar, but on this board, it is the output.

In this configuration you only need to provide 5 volt power to one of the two boards; if you're powering the Banana Pi with a standard micro-USB power supply, that will power the detector board via the connections we've just made, as well.
I placed the detector in a standard plastic box, which does not prevent the penetration of radiation, unlike metal boxes.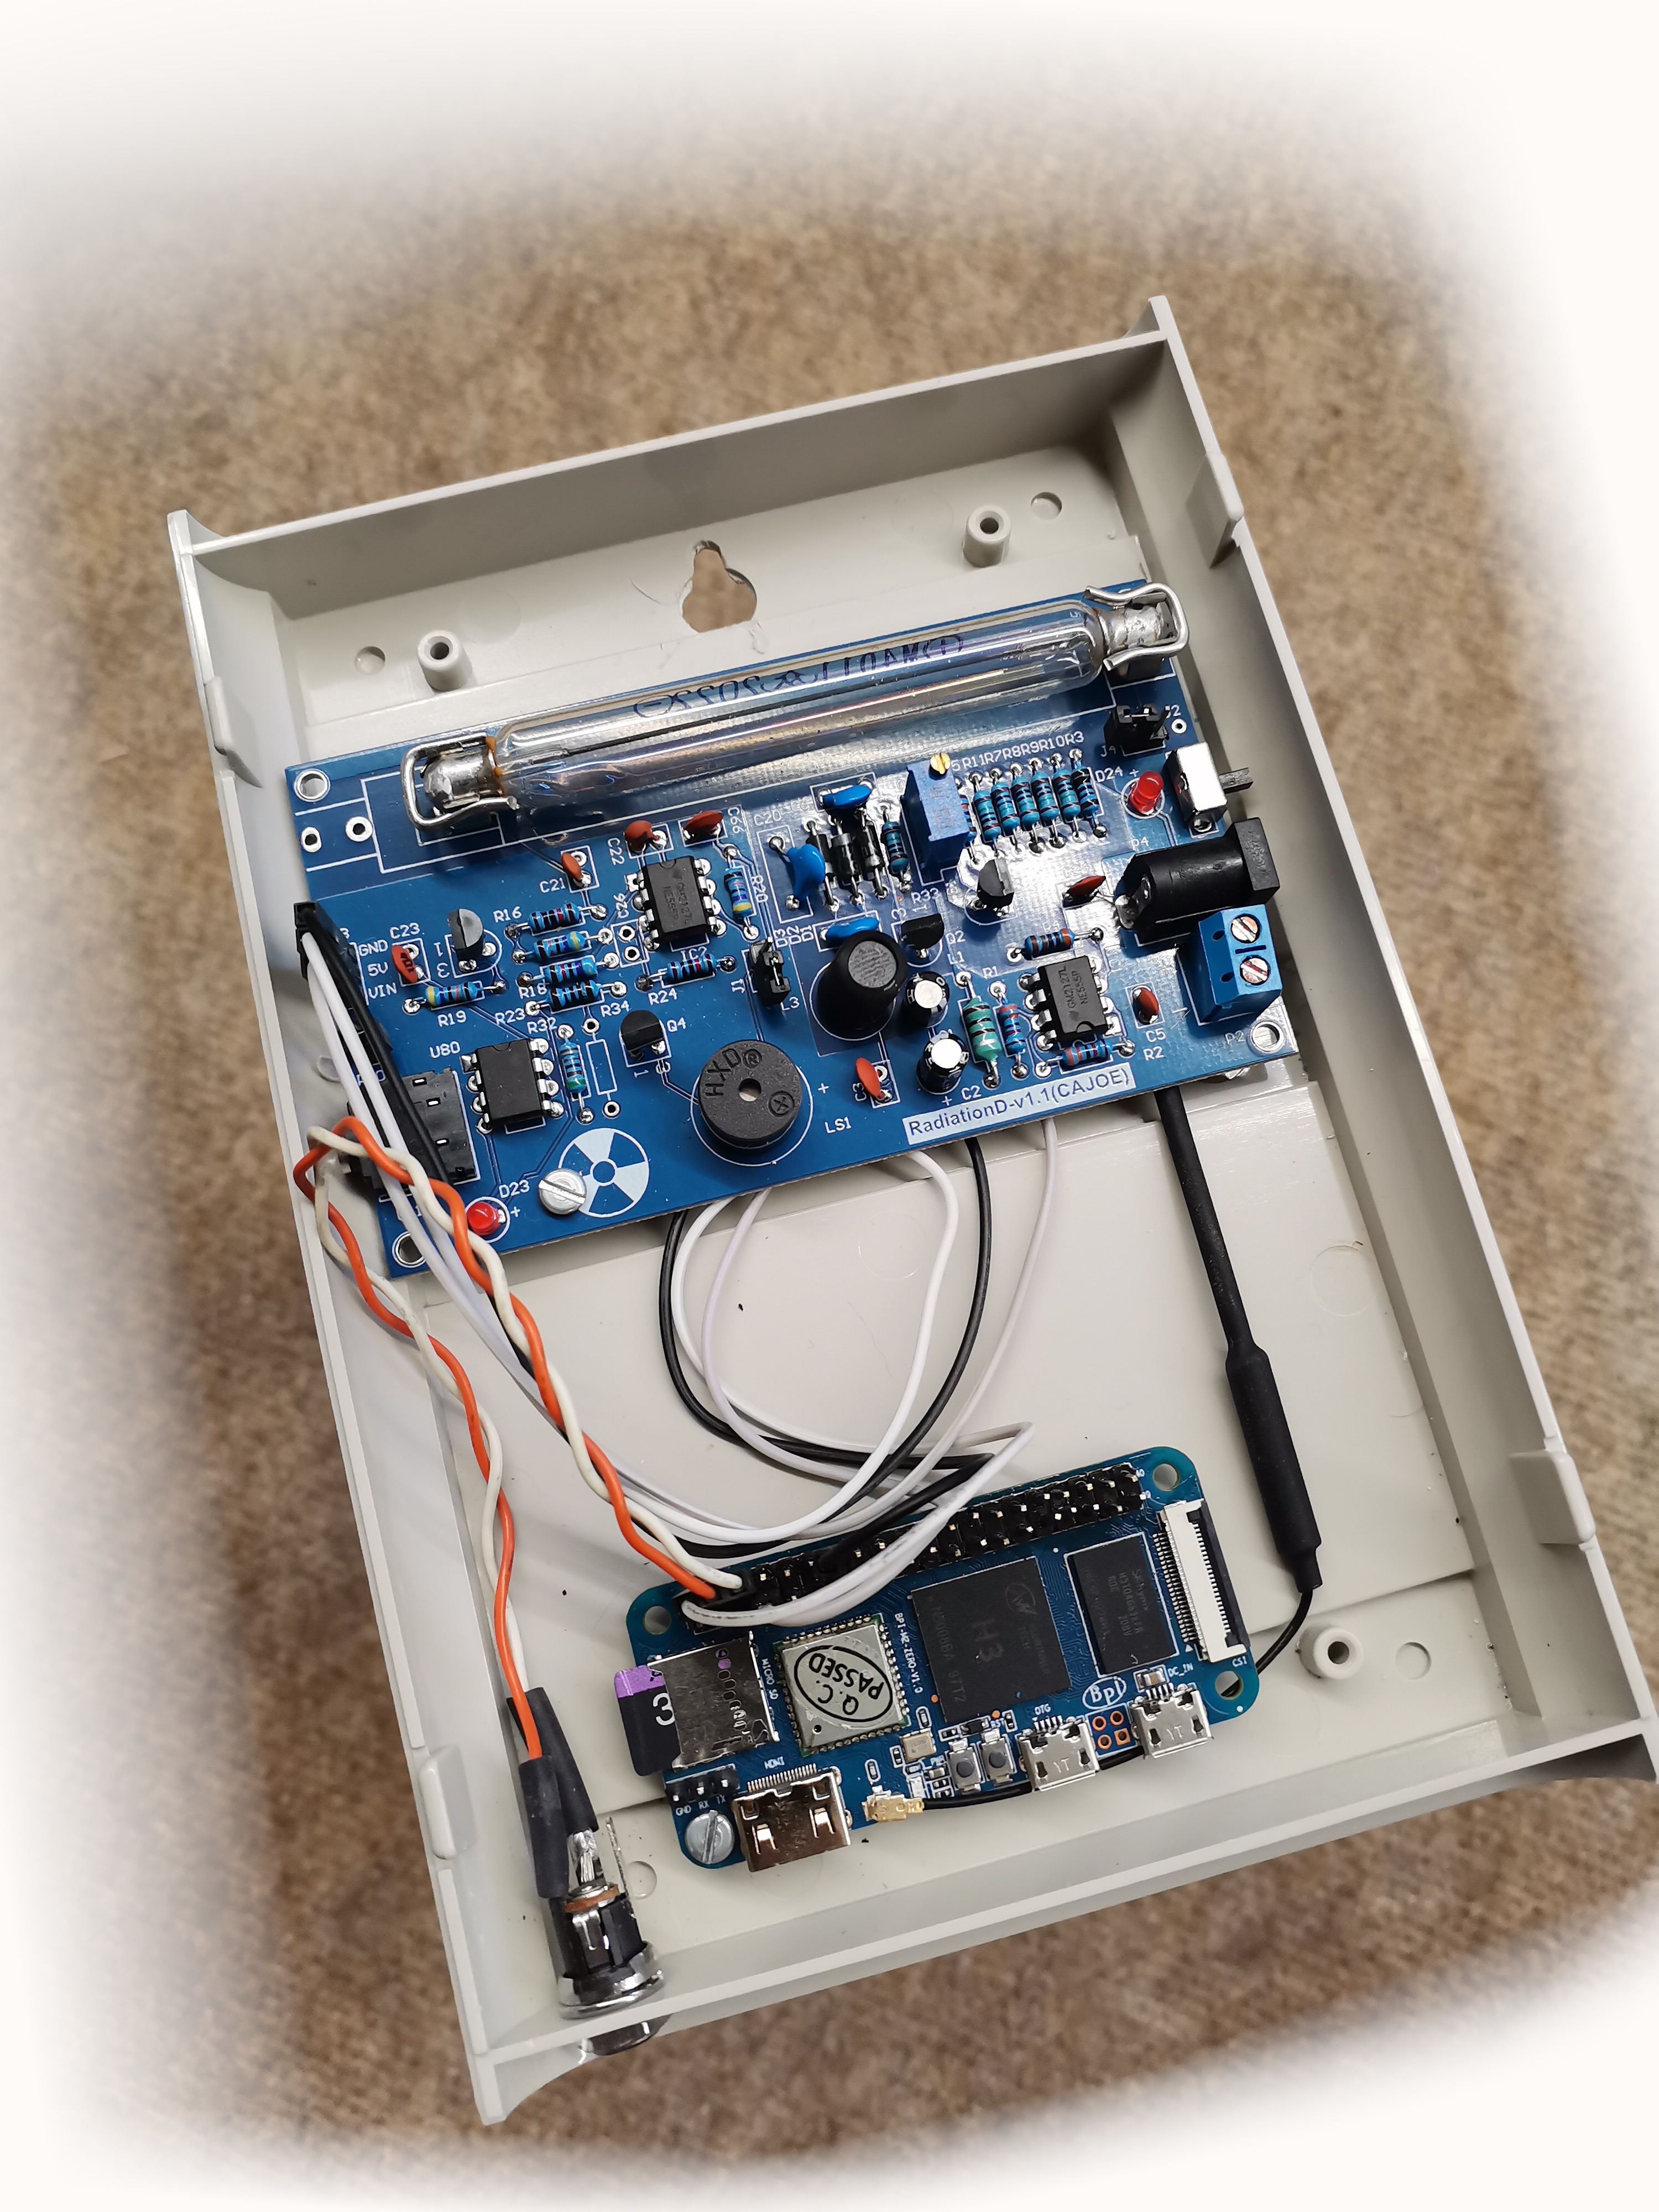
Software setup
You have two options:
1. Download a prepared image with preset values.
2. Install a debian based image on your BPI-M2 zero, then install necessary software components and run the python application, stored in src directory.
How to use the image:
Just download geiger.img and write it on the SD card. To do so, You need some suitable software to upload the img to the sd card, for example BalenaEtcher, or Win32DiskImager, or something similar, or the dd command in Linux CLI:
sudo dd if=geiger.img of=/dev/mmcblkx*
where mmcblkx must be replaced with appropriate name of SD card on your system.
Insert prepared SD card to your BPI-M2 and plug power, system should start. After time You can configure geiger according to your needs trough console or via WiFi. If you use console just log in as root user. If you decide to use Wifi, wireless adapter on BPI-M2 is preconfigured as AP (access point) with BSSID geiger and password 12345678. just connect to this AP from your computer and find out IP address of BPI-M2 from your DHCP server. Now you can use SSH client on your PC for login BPI-M2 on IP address 10.1.1.1.
There are two system users defined. User root and user pi. Both of them are set bananapi password. After login , another steps are required. First of all:
Change the passwords after first login due to security.
Using the utility armbian-config change your wireless mode to client and connect BPI-M2 to your existing wireless network as client, or change secrets in file /etc/hostapd/hostapd.conf. If you change wireless mode to client do not forget stop and disable DHCP server service. You can do it by
systemctl disable isc-dhcp-server.service
systemctl stop isc-dhcp-server.service
Now is system ready to harvest radiation in your locality every minute and write values to the [InfluxDB database](https://docs.influxdata.com/influxdb/v1.8/) as time series. Predefined database is *geiger* and two users are defined to full database access. User *admin* with *admin* password and user geiger with password geiger.
Drawing graphs and visualization measurements are provided by Grafana reachable under:
http://IP_address_BPI-M2:3000
login screen appear. You can log in as user admin with password admin for full access rights, or as user viewer with password viewer for view graphs with restricted rights.
Some of user parameters can be changed in /home/pi/geiger/config.py file. You can change measurement interval geiger_measure_int . Stored values is in seconds. Divider is value represent relation between CPM (count impulses per minute) value and uSiviert value and depend on used type of geiger tube. geiger_gpio_line is set to 6 and represent GPIO port on BPI-M2. You can change it under your needs, but keep in mind, that port you choose must support hardware interrupt.
How to install manually:
- Take BPI-M2 ZERO or similar (I have probed and tested it only on BananaPi M2 ZERO)
- install debian Linux (Armbian, Ubuntu, ...)
- install InfluxDb
- install grafana-server
- download \*.py files from *src* directory
- change content of configuration file \*.py files (config.py) under your database and hardware settings
- run application with python3 counter.py
Disclaimers
You may use the program as is at your own risk, no updates or modifications to the code will be made, and no warranties or claims for damages will be made in connection with any use of this code.